STEP1: Spary
Using your Spray primer (only time I use mine is for terrain) spray coat the whole fountian. Remember to remove the peg. Also use a nice open area. I went outside, this pic is after it dried (Im not that good)

STEP 2: Paint!
So you can see here the paints I used. This brand was picked up at local arts store, cost around $5 each. A wide paintbrush. Mix colors how you see fit. I went for a semi marble appearance.


basic layer, all grey.

added a drop of Blue ink for a bit of color

add some white

add some more white, then pure white to highlight areas.
Make sure to have all the colors you want in. After this there is adding water, so we want the paint to dry completely, best overnight to make sure.
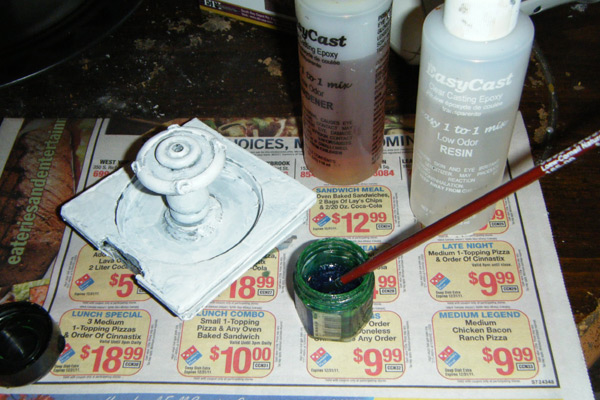
STEP 3: WATER!
Perhaps the trickiest part. If not applied correctly it could mess everything up. First a note: I had to cut out the back end of the fountain for the battery fit (but I will get into that tomorrow).
WATER! You can see here I am using EasyCast 2 part epoxy. This is the one I use, there are others out there, but I got this on sale and it always comes thru for me.
You want something to stir the mix with (an old brush in this case), and something to mix in (an old GW paint pot). Also something to measure, I use an old teaspoon. Be VARY CAREFUL while mixing this stuff. You want even parts, and lay down a newspaper whilst working, just in case.
STEP 4: Waterfall
Now for an extra step adding detail.
(NOTE: Wax paper with epoxy will shrink, I just learned this while working on project)
WE will use Wax paper, its clear and will absorb some of the epoxy for a nice effect. Zap-A-Gap is also clear and will hold the wax paper down.

Take some wax paper and cut strips that will fit from the upper lip of the stem into the water below.

Super glue the top of wax paper to the upper lip. Bend some of the wax paper so it will touch the dried water below.

OK , lets try that again. Here is the water on the upper lip. We add new strips of wax paper, smaller ones this time.

Carefully pour a new mix of epoxy onto the top of the stem (over the lip) and onto the wax paper, allowing it to drip into the water below.

And there we have our water! looks nice right? Now we allow to dry overnight and hope for the best.
At this time you also want to make sure the peg is still fully removable, or you may have problems later.
Tomorrow we will look at the base display creation, until then I am going to try to read...new projects begin in the new year!
No comments:
Post a Comment